Blog - Landscaping Mississauga Terravida

Nestled along the shores of Lake Ontario, Mississauga boasts a vibrant community and a thriving urban landscape. As the city grows, so does the importance of sustainability. One impactful way to contribute to a greener future is by cultivating a sustainable garden. Whether you have a sprawling backyard or a cozy balcony, here are a few tips to help you create an eco-friendly oasis right in the heart of Mississauga. Use Native Plants Embrace the natural beauty of Mississauga by incorporating native plants into your garden. Native species are well-adapted to the local climate and soil conditions, requiring less water and maintenance. They also provide essential habitat and food for native wildlife, fostering biodiversity in your backyard. Prioritize Water Conservation Since water conservation is crucial in our community, one of the best ways to respect the environment is to opt for drought-tolerant plants and implement water-saving techniques such as mulching and drip irrigation. You can also collect rainwater in barrels to use for watering your garden, reducing your reliance on municipal water sources. Compost Your Leftovers Turn your kitchen scraps and garden waste into nutrient-rich compost to enrich your soil naturally. Composting not only reduces the waste sent to landfills but also enhances soil structure and fertility, promoting healthier plant growth and reducing the need for chemical fertilizers. Implement Organic Gardening Practices Say no to harmful pesticides and synthetic fertilizers that can harm beneficial insects, soil microbes, and waterways. Instead, practice organic gardening methods such as plant rotation, companion planting, and integrated pest management to keep your garden healthy and balanced. Build Wildlife Habitats Create a welcoming habitat for local wildlife by incorporating features such as bird feeders, bee hotels, and butterfly gardens into your landscape. These additions not only attract fascinating creatures but also contribute to pollination and natural pest control. Reduce, Reuse, & Recycle Get creative with repurposing materials in your garden to minimize waste and reduce your ecological footprint. Use reclaimed wood for raised beds, repurpose containers for planters, and recycle household items as garden decorations or tools. Never Stop Learning Even after your sustainable garden is established, try to stay informed about sustainable gardening techniques and innovations by attending local workshops, joining gardening clubs, or following online resources and forums. Gardening is a journey of continuous learning, and staying updated can help you adapt and improve your practices over time. Adapt to the Seasons Practice mindful garden maintenance throughout the seasons to ensure the long-term health and sustainability of your garden. Regularly assess plant health, manage weeds manually or with natural methods, and adjust watering and fertilizing schedules based on weather conditions. Celebrate Successes Don't be a afraid to take pride in the positive impact your sustainable garden has on the environment and the community. Share your successes, big or small, and celebrate milestones such as harvests, wildlife sightings, and increased biodiversity in your garden. Sustainable gardening should be a fun endeavor, so enjoy every accomplishment, no matter how small it might seem! By following these tips, you can create a thriving and sustainable garden that not only enhances the beauty of your home but also contributes to a healthier planet for future generations to enjoy. Start small, experiment, and watch your garden grow into a green sanctuary that inspires others to follow suit in cultivating a more sustainable world. Need a little help starting your sustainable gardening journey? Our garden designers and installers are just a call away!
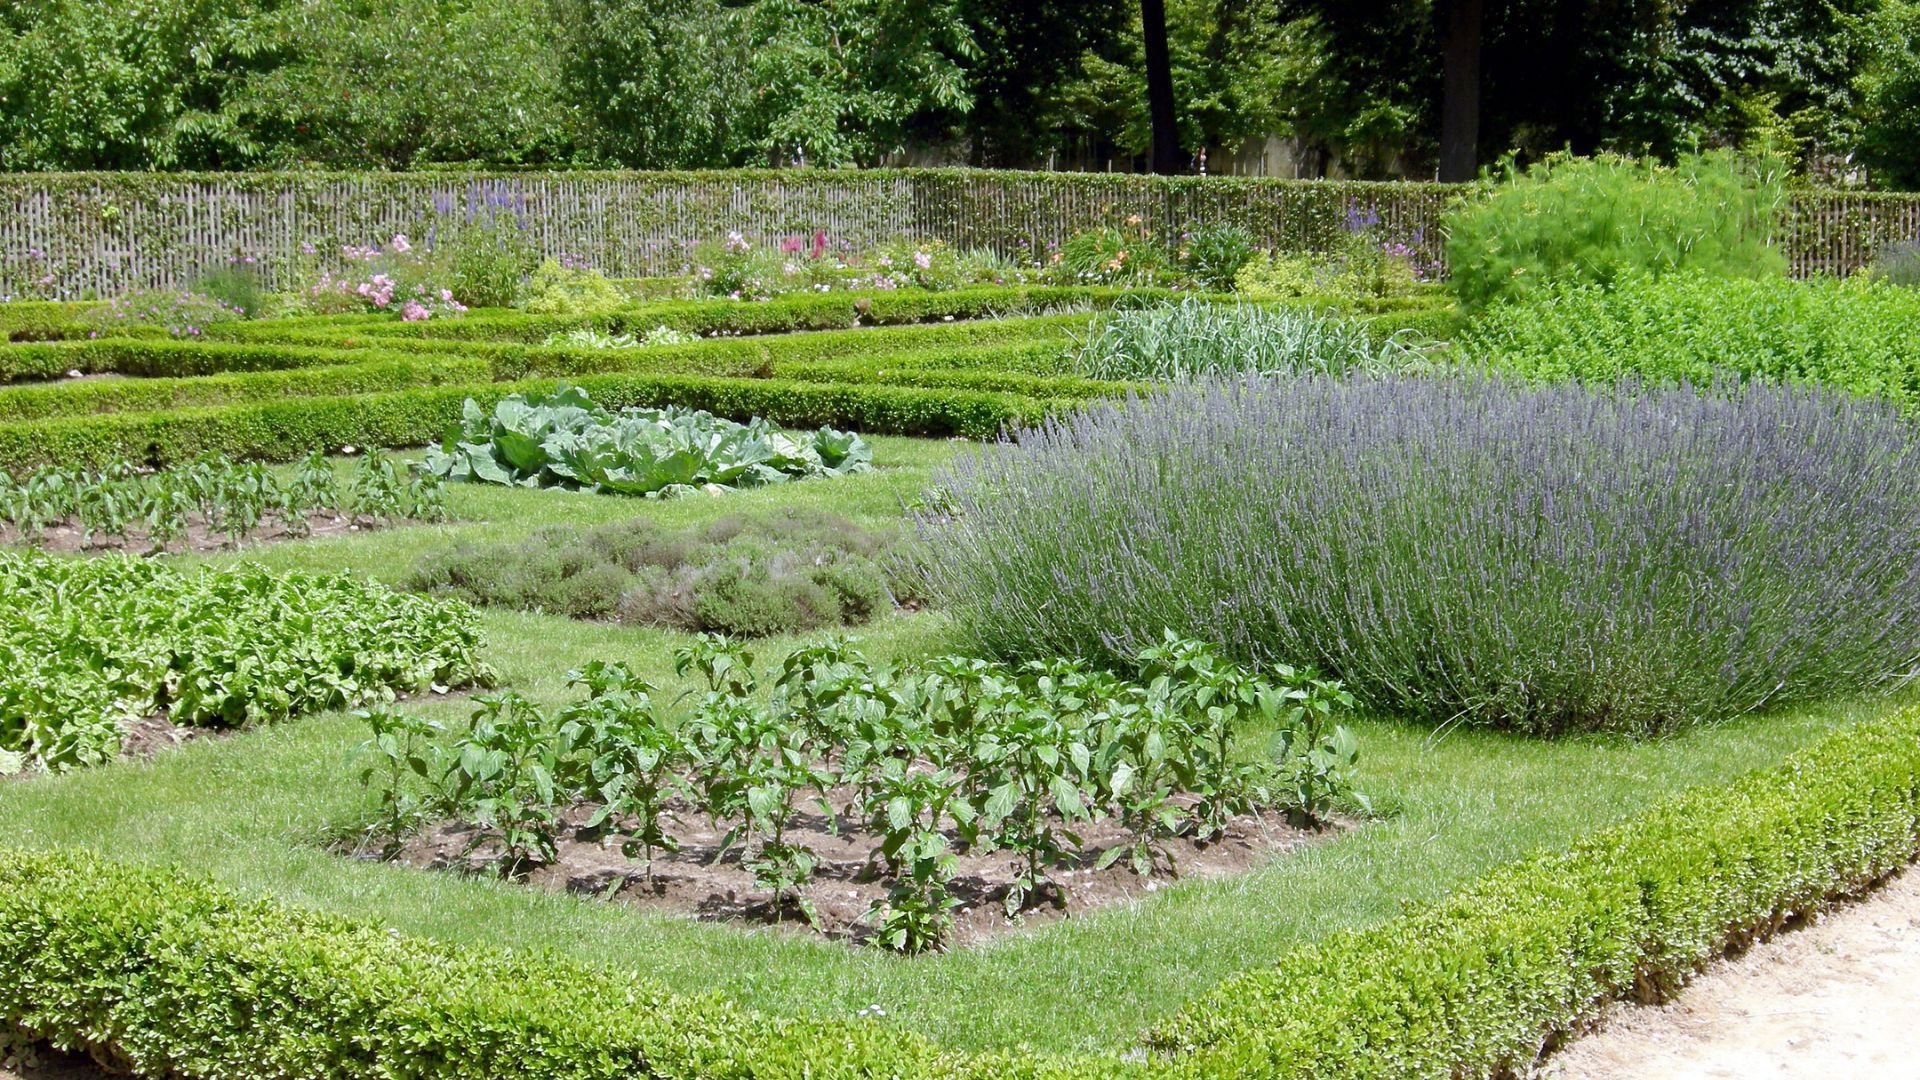
With three large lakes less than 300 kilometers away, our climate in Mississauga is unique. Summers are warm and generally pleasant, but winters can be very windy with plenty of cloud cover. This presents a challenge when choosing perennial landscaping plants - they must be hardy enough to survive the winter without getting scorched on the hottest days of the summer. As in any climate, the best way to ensure that your landscape thrives is to use as many native plants as possible. Here are a few of our favorite local species to bring color and year-round life to your landscape: Milkweed Asclepias incarnata, also known as swamp milkweed or rose milkweed, is a native perennial that produces pink, purple, or white flowers during the summer. It can grow up to 150 cm tall, providing visual interest in larger flower gardens where it remains fully visible behind smaller plants. Milkweed thrives in damp soil and can handle both full sun and partial shade. Its blooms can be cut and used to beautify the inside of your home as well - milkweed flowers last longer after being cut than many other flower species. And as an added bonus, milkweed is one of the favorite foods of Monarch butterflies, so you just might attract a few very welcome guests to your landscape! Canada Anemone Canada anemone, native to the shores of Lake Ontario, is one of our favorite groundcover plants thanks to its interesting leaves and white flowers. While it can be too aggressive to plant near some smaller or more delicate species, it is great at filling in areas that remain too moist for more traditional lawn coverings. It’s low profile also allows you to mow over it without damaging it if you use proper lawn mower settings. If you are looking for hardy, low maintenance ground cover that also produces attractive flowers, Canada anemone is the way to go. Once it takes root in your lawn or garden bed, it will give you beautiful greenery for many seasons with very little effort! Red Dogwood Red dogwood is a favorite landscaping shrub in many northern climates thanks to its hardiness and adaptability. It produces white flowers in the spring, then white berries in late summer. Our favorite thing about this large shrub, however, is the winter color it brings. As its leaves fall in autumn, its red branches become the perfect focal point for a winter landscape. Native to North America, red dogwood can grow in dry conditions and can also tolerate standing water. It thrives in partial shade to full sun, and will provide great shade for your yard when it reaches maturity. It can grow to be 2 to 2.5 meters tall, but can also be trimmed back almost to the ground every few years if you want to keep it small. Whether you plant a single shrub or use it to line your property, red dogwood plants will serve you well for many years with just a little bit of tending!
If you have ever spoken to a landscaping professional, you have probably heard the word “hardscape” used. You may have even heard about the many benefits it can bring, both to you and to the environment. It’s hard to decide if you are interested in hardscaping if you don’t know what it is, though. So what exactly is a hardscape? Hardscaping refers to any landscaping element that is not living. It is the opposite of softscaping, which is the living, changing, and malleable parts of a landscape (i.e., your grass, trees, shrubs, and flowers). Hardscaping, on the other hand, is “set in stone” (and often made of stone as well!). Hardscaping elements can include everything from birdbaths to driveways. While much hardscaping is done with stone or concrete due to its durability and longevity, wooden decks and fences and even plastic accent pieces are also considered hardscaping. While hardscaping can bring great beauty to a landscape, it is more often used for its functionality. Landscaping elements like retaining walls and drainage systems can be essential to a healthy landscape, while sidewalks and patios allow people to enjoy softscape elements easily and safely. Not all hardscaping has to serve a functional purpose, however. One of our favorite types of hardscaping to design and install is water features. Though often mixed with softscape elements, water features are considered hardscaping when they use non-living materials to contain and circulate water (instead of letting that water drain into the ground). From simple fountains to elaborate koi ponds nestled in Japanese-style gardens, water features bring beauty and a calming atmosphere to any landscape. The most popular type of hardscaping we install in Mississauga is outdoor living spaces. From decks and patios (with and without outdoor kitchens) to fire pits with tiered seating, hardscaping can elevate both your entertaining potential and your own ability to relax and enjoy your property. Outdoor living spaces are completely customizable and can be designed to perfectly fit your space and your lifestyle. If you love spending time outdoors, a well-hardscaped back yard is essential! When designing a hardscape (even one as extensive as the outdoor living spaces we just mentioned), we are careful to keep hardscaping and softscaping in balance. While hardscaping can bring convenience and comfort to a landscape, too much hardscaping can make the space look sterile or commercialized. It is the living elements of a landscape - the softscape - that bring life and a peaceful ambiance to your yard. In an ideal landscape design, hardscaping and softscaping are interwoven seamlessly - flower beds surround the bases of waterfalls, held up by small retaining walls near where the patio meets lush, green turf. Gazebos are overshadowed by towering trees, and soft lights illuminate rock gardens that are home to both stones and succulents. When hardscaping and softscaping are in balance, our minds and souls can find balance as well when we linger among the landscaping. Ready to start your hardscaping project? Call our experts today for a free consultation and quote!
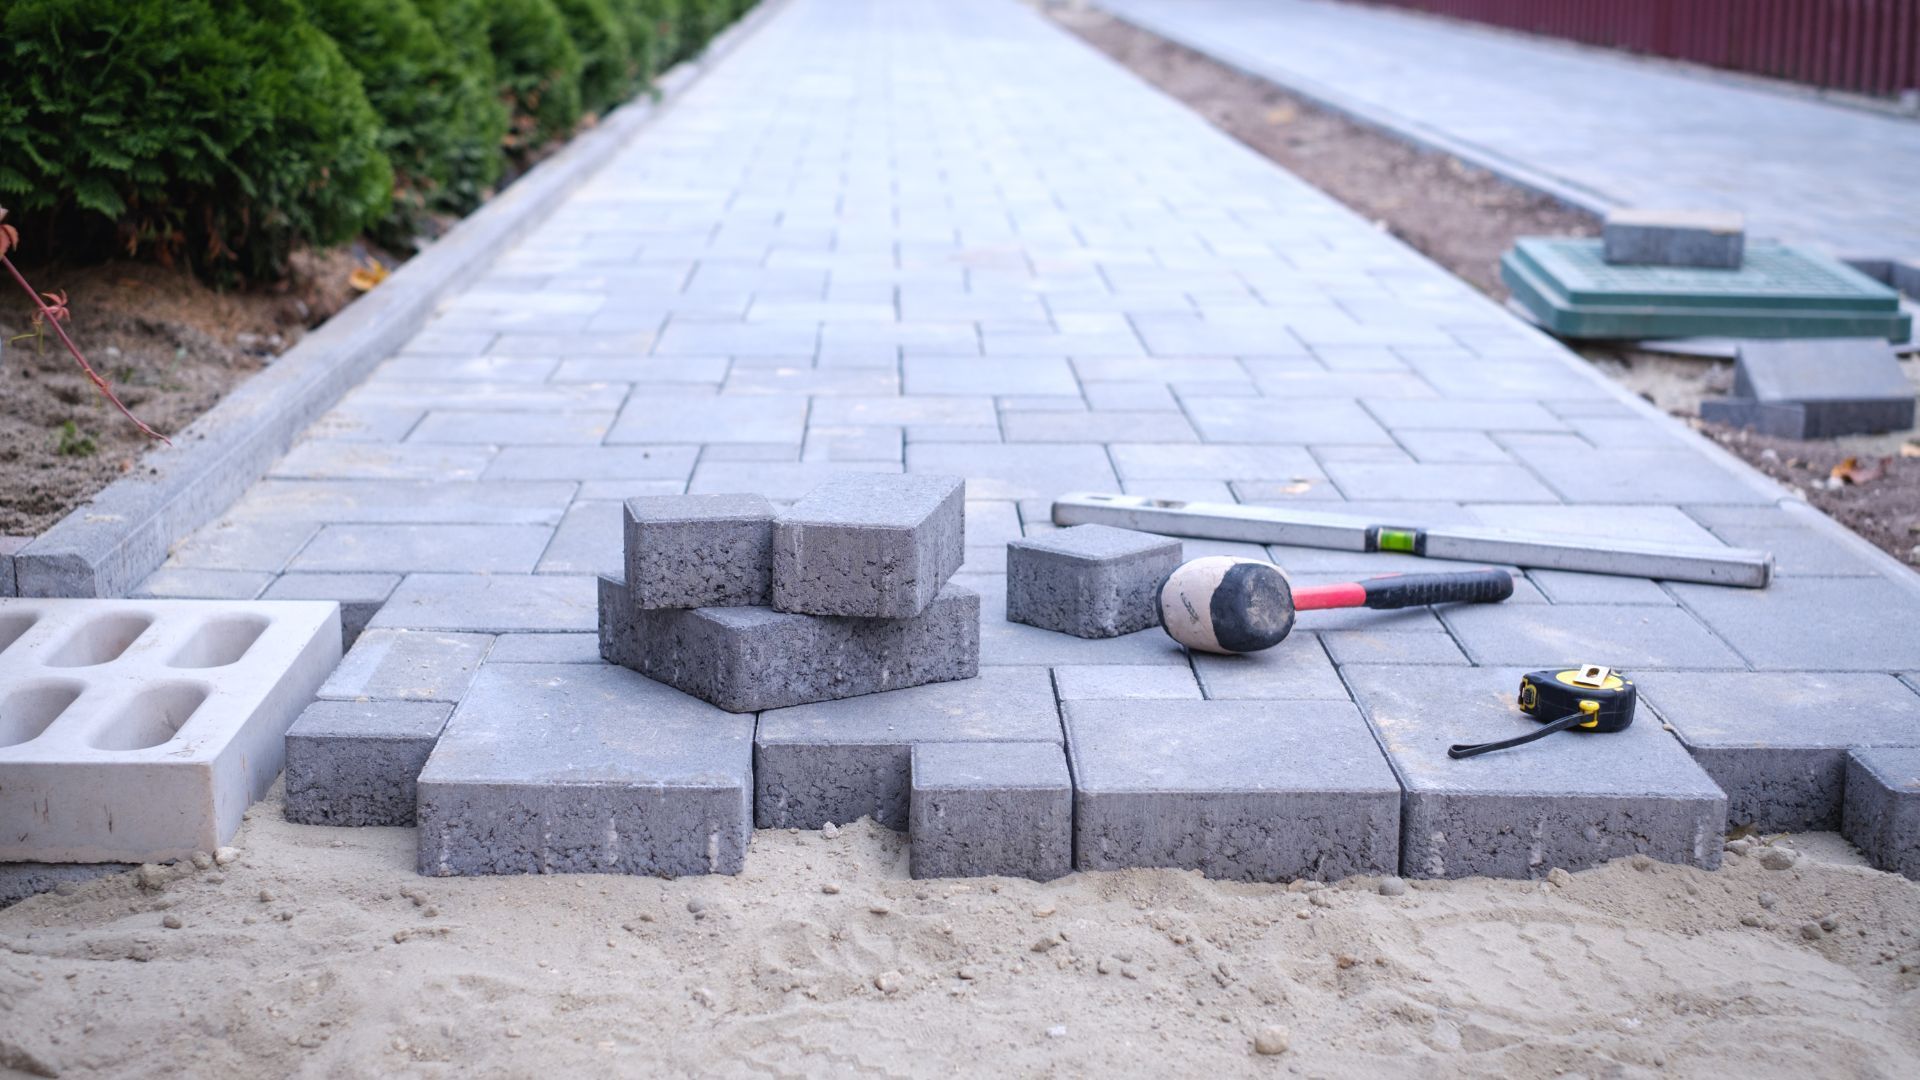
Pavers can be used to create everything from simple walkways to jealousy-inspiring outdoor kitchens. But you can’t just pick up a pallet of pavers from the home improvement store and drop them into place - they won’t last even one season if the ground is not properly prepared. Before you start to install pavers, be sure to do these three steps to ensure a long-lasting result. Mark the Installation Space You might already have a good idea of what you want from your paver installation, but now is the time to determine (and mark on the ground) exactly where you want the pavers. We recommend using white paint to draw boundary lines and using string to ensure your corners are square. String lines can also help you keep your pavers parallel to any existing structures so the final product doesn’t look off-balance. Excavate and Set the Grade Once your layout is in place, you can begin to remove grass and soil from the area. Be sure to locate all your utility lines before digging to avoid unwanted surprises! After you have removed the top layer of soil, adjust your string lines to set your grade so that water will run off of your surface in a desirable direction. Then continue to excavate to an appropriate depth - for light foot traffic, dig down to 7 inches below grade; if the pavers will support vehicles or other heavy objects, dig down 10 to 13 inches. Lay a Base Now it is time to fill in the hole you have dug with a sturdy foundation for your pavers. Start with a geotextile to both prevent grass and weeds from growing between your pavers and to keep the gravel you are about to lay from sinking into the dirt over time. Then spread between 4 and 10 inches of gravel over the entire area to be paved (the more weight the pavers need to support, the more gravel you need). The gravel needs to be as smooth and level as possible so that the pavers that sit on top of it are even. Use a tamper or a compactor to level every 2 inches of gravel you lay, then add and compact another layer until you reach your desired thickness. Finally, add a thin layer of sand on top of the gravel to level out any small irregularities in the surface. After smoothing and compacting the sand, you are ready to start laying pavers! The difference between a good paver installation and a professional paver installation often comes down to the attention that was paid to details during the preparation. Meticulous care must be taken during each of these steps to ensure that water doesn’t pool on your new patio (or worse, run off toward your house!) and that your pavers don’t shift after the first heavy rain. If you find yourself in over your head at any time during the paver preparation process, give us a call. Our paver professionals are here to help you prepare your space for a durable and precise paver installation!
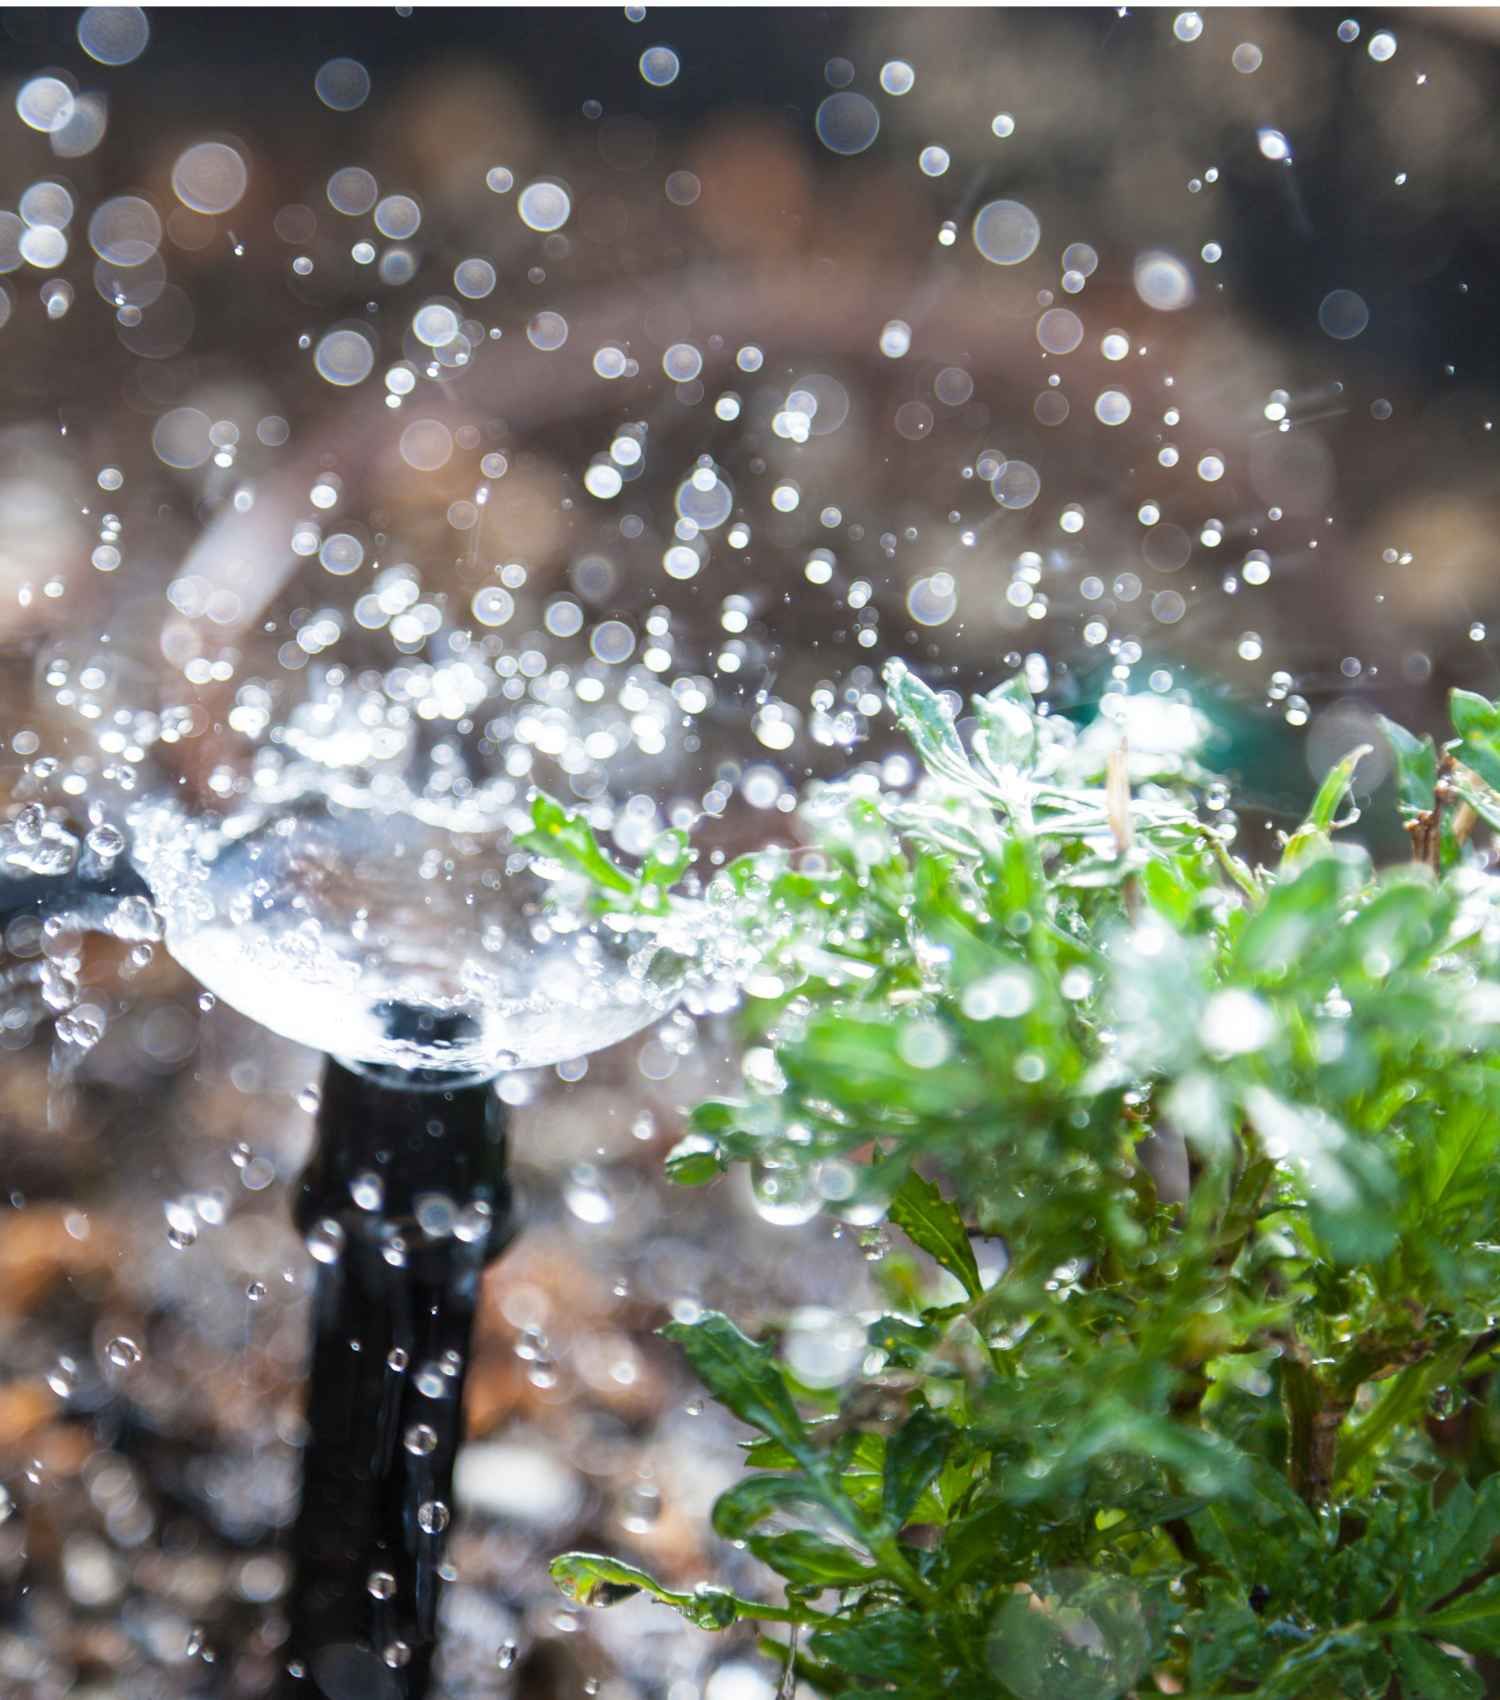
How Often To Water Your New Landscaping? The frequency with which you should water a plant is typically determined by several factors, including the length of time the plant has spent in the soil, the type of soil in which it was planted, the season, the variety of plant, and the quantity of rainfall that has been falling in the area. Water is essential to the survival of everything that breathes in your outdoor space. For this reason, it is essential to water plants appropriately, whether watering planters by hand or using a sprinkler system to get a lush, green lawn. Tips for Watering Your New Landscaping Weekly check of all the plants In the first two weeks after being planted, check on the newly-placed trees and bushes every few days. Checking on annuals and perennials more frequently is recommended. After those initial two weeks, check in every seven to ten days. Dig with your fingertips around the root zone to a depth of 2–3 inches for smaller plants and 6–8 inches for larger plants and trees; water abundantly if the soil seems dry. Deep and slow watering Deeper watering is another helpful suggestion for ensuring that your young plants get enough moisture. The roots of your plants will benefit more from a deep watering of the soil than a surface watering that is only a few inches deep. Put the hose at the bottom of the plant and turn it on, so it barely drips. If you are unsure how long to water young plants, aim for 30–60 seconds for tiny plants and longer periods for larger plants while rotating the hose to a few different spots around the plant. If the earth already feels moist, don't water it. In between watering, the soil needs to dry out. Over time, a plant's health will decline if kept in permanently wet soil. Overwatering can cause a plant to rot from lack of oxygen or fall prey to pests and diseases. Lawn irrigation systems allow you to water plants slowly and thoroughly at their roots. Watering adjustments as the plant grows The way you water your landscape may need to change as it gets older and more established: Except during periods of rain, plants need to be watered every day for the first two weeks after planting. After a month, you can cut back to watering once or twice a week. Try to water your plants less frequently in the months that follow. To get the most out of your watering sessions, you should saturate the soil rather than just the top few inches. Plants and trees that have already been established require the same care as newly planted ones, as they must also wait for their roots to get established before they may flourish. These extensive networks can keep the trees alive through the summer's dry spells. Early morning watering Early morning is typically best when you're watering a brand new plant or an established one. If you water your plants' first thing in the morning, they have a better chance of using every drop. If you are setting up new landscaping, watering is highly important. Consult Landscaping Mississauga Terravida for more information on your landscaping watering.

What Planting Zone is Mississauga In?